
Urban exploration – often shortened to “urbex” – is the practice of venturing into the hidden or abandoned nooks of our built world. It can mean slipping through a broken window into a long-empty factory, sloshing through silent storm drains, or climbing into rusted rooftops. The appeal lies in discovery: finding the beauty and history in structures that cities have moved on from. Equipped with a camera, a flashlight, and careful planning, urbexers (as enthusiasts are sometimes called) document the decay and stories of once-thriving places. But exploration of forgotten buildings is not mere recklessness or thrill-seeking. It is a blend of travel, photography, and research that demands preparation. This guide explains everything a curious traveler needs to know – from the origins and ethics of urbex to the legal maze, safety precautions, research methods, gear lists, and photography tips – so adventurers can navigate abandoned worlds responsibly and with confidence.
- What is Urban Exploration (Urbex)?
- Is Urbex Legal? Understanding Laws & Risks
- The Urbex Code: Ethics & Community Norms
- Planning Your Urbex Trip: Research & Recon
- Risk Assessment: Site Hazards & How to Evaluate Them
- Essential Urbex Gear & Packing Checklist
- Photography for Urbex: Settings, Composition & Workflow
- Fieldcraft: Entering, Moving, & Exiting a Site Safely
- Special Environments: Sewers, Rooftops, Tunnels, and Abandoned Transit
- Drones & Urbex: When to Fly, Permissions & Privacy
- How to Get Permission (Legally Visiting Abandoned Sites)
- Legal Alternatives to Trespassing (Safe Urbex Experiences)
- Publishing & Monetizing Urbex Content (Without Getting in Trouble)
- Insurance, Liability & Travel Logistics
- Community & Etiquette: Joining the Scene
- Worst-Case Scenarios: Arrest, Injury & What to Do Next
- Best Practices Checklist (Quick reference)
- Conclusion
What is Urban Exploration (Urbex)?
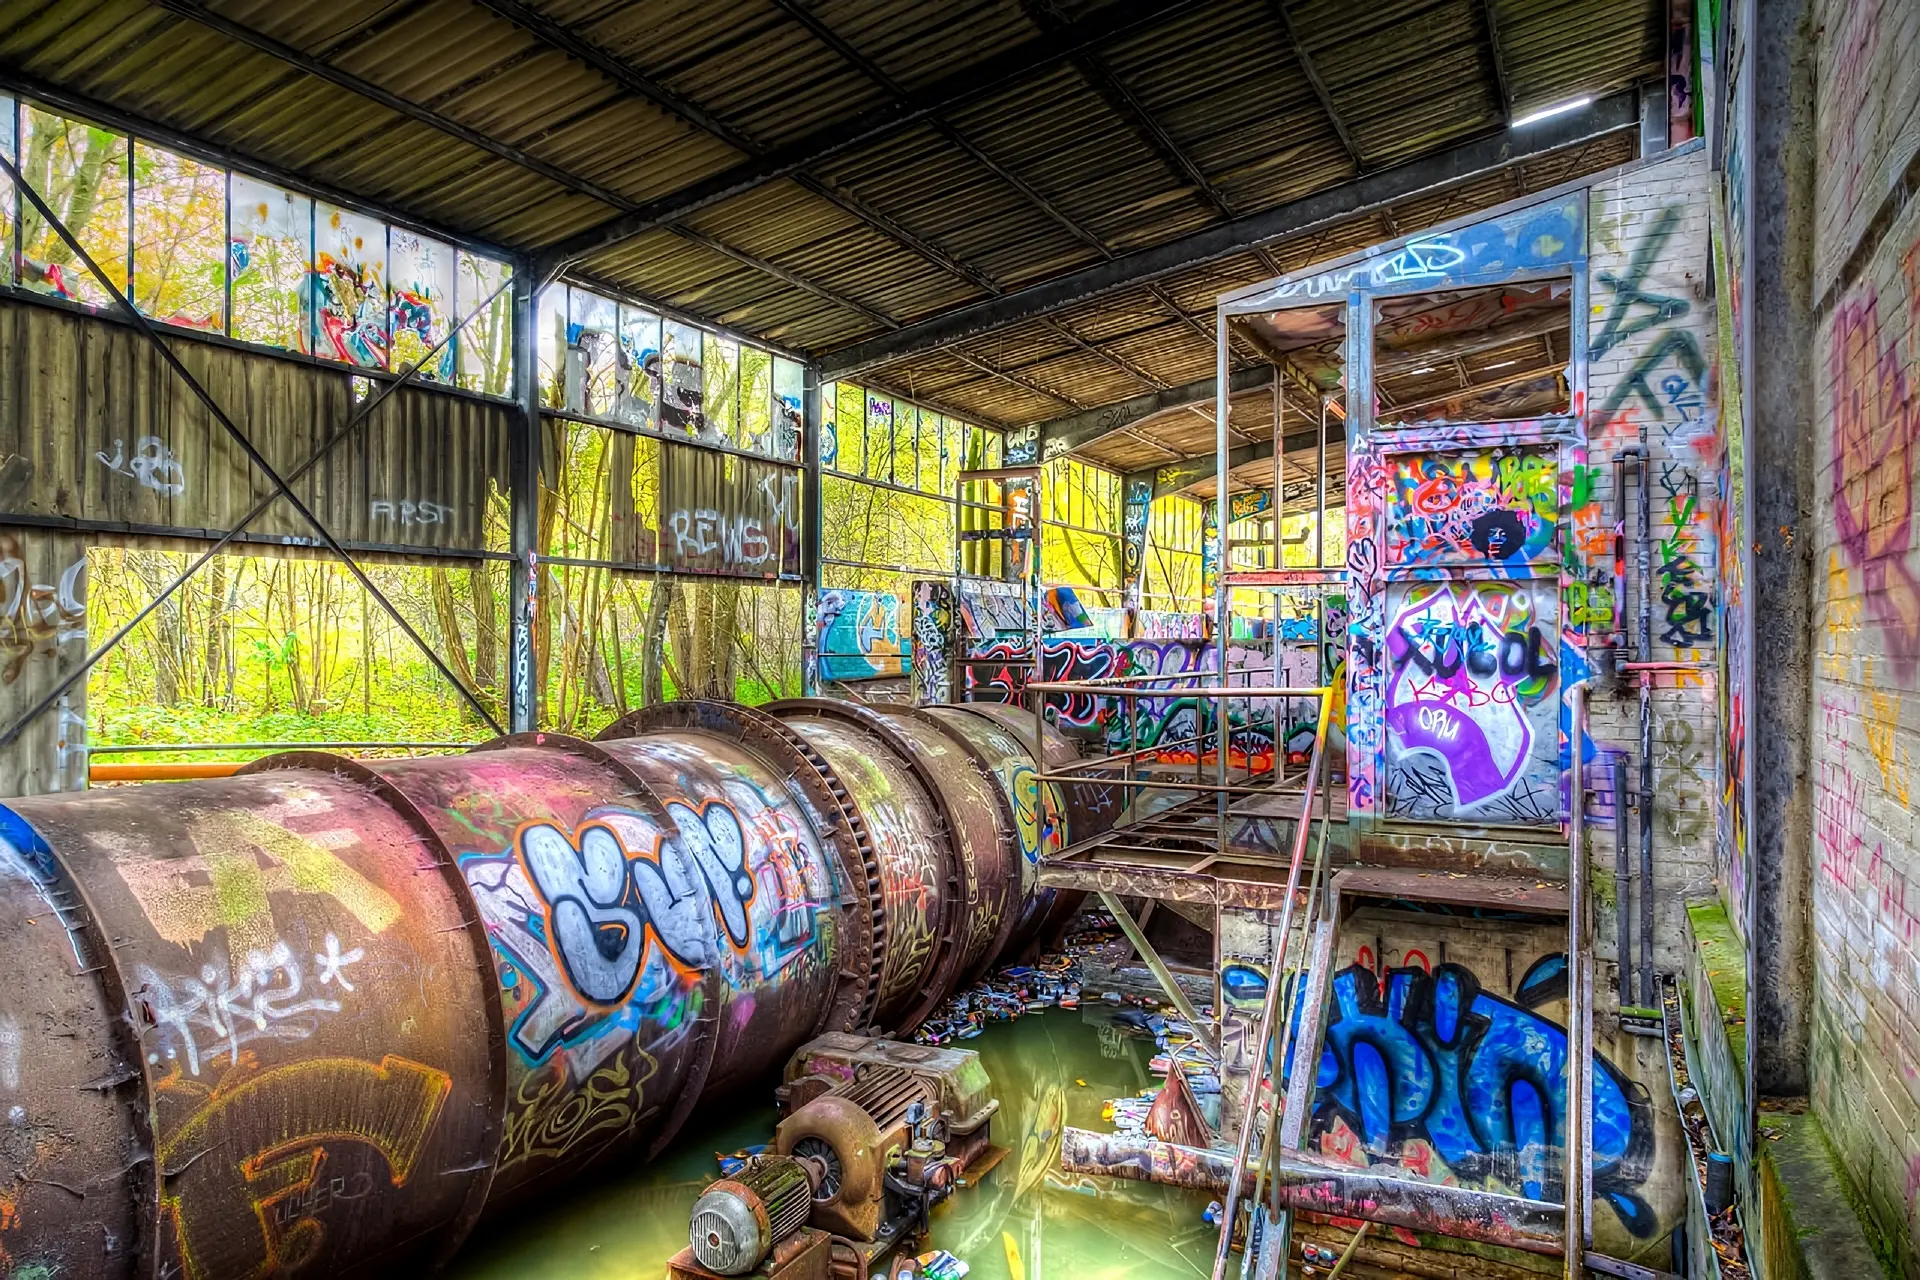
Urban exploration is essentially the exploration of manmade structures, usually those long since abandoned or hidden from public view. The term “urbex” is shorthand for “urban exploration,” and other nicknames include UE, draining (for sewer/drain exploration), and place-hacking. It is not sightseeing or conventional tourism; it often involves trespassing into off-limits sites just to see and photograph them. At its core, urbex is driven by curiosity about the layers of history in a city’s back alleys and forgotten facilities. Photographers, historians, and adventure-seekers alike pursue urbex as a way to document “lost places,” whether they be ruined hospitals, deserted power plants, closed amusement parks, or network of subway tunnels.
Over the past few decades, urbex has developed a subculture and even academic interest. In the 1990s and early 2000s the “Zine” Infiltration helped define early urbex ethics and lore (its anonymous author, known only as Ninjalicious, outlined basic rules and techniques). In recent years urban anthropologist Bradley Garrett has written about “place-hacking” in cities – using urbex as a lens to study how people interact with urban space. Though many explorers share tips online or in small community sites, long-time adventurers emphasize a mindset of respect and documentation. As writer Jeff Chapman (Infiltration’s founder) put it, urban explorers “never vandalize, steal or damage anything” – the thrill comes from discovery and the photos taken.
- Types of Urbex: The genre of urban exploration spans several categories. The most typical is exploring vacant buildings: these could be old factories, hospitals, schools, churches, hotels or homes that were left to decay. Explorers also venture into drains and sewers (“draining”), where hidden networks of pipes and tunnels carry water under cities. Rooftopping or “roof hacking” is another extreme offshoot: skilled climbers ascend rooftops, cranes, water towers or bridges (often illegally) for panoramic views and photos. And there are specialized niches like urban spelunking into service tunnels or catacomb exploration beneath cities. Each type of site brings its own risks and techniques, but all share a common thread: seeking out places unseen by ordinary tourists, to capture images and stories that would otherwise remain hidden.
Is Urbex Legal? Understanding Laws & Risks
Urban exploration exists in a legal grey zone. In most countries, abandoned structures still have owners, even if nobody lives there. Entering such property without permission is usually illegal. In legal terms it’s often classified as trespassing – civil or criminal – depending on the jurisdiction. In fact, even signposts like “No Trespassing” or fences make entry a crime. As one guide notes, “Even if a building looks abandoned, it doesn’t mean the owner has relinquished rights”.
- Global Summary: There is no simple yes/no answer to “Is urbex legal?”. Generally speaking, any entry without permission is at your own legal risk. Many countries categorize unsanctioned entry as a misdemeanor or misdemeanor-equivalent offense. In Canada and the U.S., for example, property owners can press charges for trespassing, and this could lead to fines or even short jail time. Some jurisdictions differentiate between civil trespass (owner sues you for damages) and criminal trespass (government charges you); both are possible outcomes. In Europe the situation varies by country: some nations impose heavier penalties (for example, certain U.S. states and countries like the UK or Australia can treat trespass more seriously if damages or risks are present).
- Trespass vs. Legal Access: Some explorers find legal alternatives. For instance, derelict sites that have been opened as public parks or art projects can be entered without trespass. Where possible, always check if a site can be visited legally: some famous ruins (museums, guided tours, repurposed hotels) welcome visitors. This guide emphatically advises never to advise evading the law. We will not help with “how to avoid getting caught.” Instead, we emphasize doing urbex in ways that respect safety and law. If a building is truly off-limits (chained, signed “No Trespassing,” patrolled by guards or cameras), one should not enter. It is far safer – and often more rewarding – to find those curious abandoned places that owners allow you to enter, whether openly or by invitation.
- Laws by Country: Laws vary widely. In the United States, trespassing law is state-specific. In some states (like Texas or Florida) penalties can be severe: even first-time trespassers may face misdemeanor charges, fines up to $1,000 or some jail time. In other states the law is more forgiving (often civil unless other crimes are committed). In Canada, entering without permission can mean charges under provincial Trespass Acts or even criminal Mischief if damage occurs. In the UK, trespass in itself is often only a civil offense (the owner can sue) unless you break in or intend a crime; but railways and military bases have strict no-trespass rules with police enforcement. Australia and the EU each have nuances – for example, the Sydney Urban Exploration community had its site shut down due to safety/legal concerns – so one should research local statutes. The bottom line: treat every urbex trip as if you need explicit permission, unless you verify the site is truly open to explorers.
- If Confronted by Police or Security: Many explorers report that if approached by police or security, the best approach is calm compliance. Politely identify yourself if asked (in some places, explorers use their photography press or media credentials), but do not argue. If you are discovered without permission, security may simply escort you out or ask you to sign a warning. If arrested or threatened with charges, exercise the right to remain silent and ask for a lawyer. In general avoid provoking an incident: do not run or hide when confronted – that could escalate to criminal charges. If followed by police or owners, walk out immediately or explain (briefly) that you thought the site was safe/legal. Harassment or violence from either party is illegal, so always stay respectful and document any encounter. (Note: local laws may allow recording conversations in public, but be cautious – focus on compliance and safety first.)
The Urbex Code: Ethics & Community Norms
An essential part of urbex is the unwritten code – a set of etiquette rules that most explorers follow. These rules help protect sites, preserve the community’s trust, and keep everyone safer. Chief among them is the principle: “Take nothing but photos, leave nothing but footprints.” In practice, this means:
- Don’t vandalize or steal. Never break or alter anything in the space (no graffiti, no moving or taking objects). Removing artifacts not only desecrates history but can break laws (theft or destruction) and anger the local community.
- Respect the site. This means avoiding damage (no kicking doors or windows, no burning fires, no loud noise or fighting). Many urbexers will walk silently, tag only with “light writing” like dust drawings (if at all), and report hazards rather than exploit them. If exploring with others, discuss rules so everyone upholds them.
- Leave it as you found it. After a visit, the place should look the same (or better) than before. Some explorers even pick up a stray piece of trash if safe to do so. The local urbex community often reminds newcomers that removing even small souvenirs (an old toy, a photo, a tool) is taboo. You are not borrowing the place, you are visiting it.
Another cornerstone is privacy of locations. If you find a cool spot, think twice about sharing its exact address online. Many forums and explorers believe it’s irresponsible to spread locations publicly because it can lead to vandalism, too much tourist traffic, or stricter security measures (like padlocks and cameras). As one community guideline bluntly puts it: “FORBIDDEN to enter private property” and “ALWAYS check if the place is completely abandoned”, but importantly “ALWAYS respect local laws and do not share or publish exact addresses.”. Instead of a full address, explorers often publish only city or a hint, so serious urbexers can find them but not opportunistic vandals.
The urbex ethos also emphasizes safety culture: never explore recklessly or alone if it can be avoided. Many veteran explorers travel in small teams, carry first-aid kits, and know basic risk control. If something goes wrong (injury, entrapment, structural collapse), a companion can help. Solo exploration is inherently riskier, so it’s typically advised only for veterans or not at all. New explorers are encouraged to pair up with an experienced partner or join a trusted group. Lastly, urbexers generally agree on no publicity stunts: don’t livestream a break-in, don’t taunt law enforcement, and don’t brag on social media about illegal entries. Keep it humble and safe.
Planning Your Urbex Trip: Research & Recon
Good urbex is about research as much as the actual exploring. Before even setting foot on a site, smart explorers gather information to avoid surprises or legal trouble. OSINT (Open Source Intelligence) tools are key:
- Maps and Satellite Imagery. Use Google Maps, Bing, OpenStreetMap to scout areas. Satellite view can reveal rooftops with collapsed sections or overgrown yards, suggesting abandonment. Street View (if available) might show a boarded-up facade or warning sign. Learning to interpret these images takes practice: look for missing windows, rusting roofs, graffiti, or faded business signs. Mark potential sites as “pinpoints” for later.
- Local Data and Archives. Check local news archives, historical society records, or library files. Many cities have old newspapers or planning documents online. These can give clues about old factories, sanitarium closures, or new development proposals. If a site had a high profile (like a famous hospital or school that shut down), there might be articles documenting its closing or sale. Knowing a building’s history can even reveal the owner’s identity.
- Urbex Communities & Apps. Reddit’s r/urbanexploration, Urbexology’s crowd-sourced map, and local explorer forums can hint at where interesting sites are (but remember, accuracy varies and locations are often vaguely given). Urbexology’s map, for instance, lists thousands of “lost places” around the world – but it comes with disclaimers to always verify independently. Use community tips to get ideas, not as gospel directions.
- Local Observations. A simple walk or drive around an area can confirm if a site is quiet or overactive. Look at storefronts or empty lots. Talk to local security guards or even a friendly passerby (“Is that old building open or shut?”). Sometimes delivery drivers or utility workers can tell you who owns a disused property. But always approach such inquiries subtly and honestly (frame it as historical interest or photography, not “I’m gonna sneak in”).
- Verify Ownership and Status: If you suspect a place, try to find the official owner. In many countries, land registry offices or online property records can show the last owner. This is also useful if you plan to ask for permission (see below). If a site is truly abandoned (as opposed to temporarily closed), often the owner will have neglected it for years. But even then, someone usually “owns” it on paper. Also note: abandoned is not a legal status. A condemned site may still belong to the government or a company legally.
- Street View Scouting: Modern explorers often zoom around with Google Street View. Slowly scrolling along a nearby road can spot clues (a broken wall, a sign on a fence, fresh graffiti, vehicles). Some explorers even use historical imagery (Google Earth Pro) to see how a site changed over time.
- Document Your Reconnaissance: Keep records of what you find – screenshots of maps, addresses, notes on hazards spotted (like “the roof looks caved in” or “no windows left on second floor”). This preparation can help avoid surprises on site. Plus, if you do decide to ask for permission, you’ll have concrete details to explain what you want to do.
- Requesting Permission: If the owner can be contacted, consider writing a short, polite request email or letter before trespassing. Explain you’re a photographer or historian interested in documenting the site, and emphasize you will cause no damage. Some owners may flatly refuse, but a few will surprisingly grant access or suggest when to visit. Even if permission is denied, asking first puts you on better ground if confronted later.
Risk Assessment: Site Hazards & How to Evaluate Them
Before stepping inside an urbex site, it’s vital to mentally run a risk checklist. Abandoned places present multiple hazards. Planning means assessing the physical risks and deciding if they are worth taking.
Structural Hazards: Many old buildings are unstable. Look for sagging roofs, uneven or rotting floorboards, cracked walls, and brittle staircases. When you arrive, walk around the exterior first: peeling paint, rusted roof beams, or holes in the building’s perimeter warn of collapse risk. Once inside, test each step lightly before putting full weight on it. Some explorers use a long stick or pole (or even a video selfie stick) to prod the floor ahead of them. Keep an eye out for hanging debris or dangling ceiling tiles. If a section of floor is caving, retreat immediately – a collapse can happen without warning. In general, stay in areas that appear sound (for example, concrete buildings may be sturdier than timber-frame ruins). Always have an escape route planned. And remember: on some derelict roofs, holes let in rainwater or sunlight; never assume the floor is solid.
Chemical and Environmental Risks: Older sites often harbor toxic substances. Asbestos insulation or tiles (common pre-1980s) can be airborne hazards – avoid disturbing dusty insulation or walls. Lead paint, mold, and chemical residues (from labs, factories, or mines) may also lurk. For example, some mining towns have heavy metal contamination. Unless you have special training, do not touch or sniff unknown substances. It’s wise to wear at least an N95/P2 respirator mask whenever inside such sites. Always wash hands and face thoroughly after a visit, and launder your clothes separately if you suspect contamination.
– Radiation/Toxins: Rarely, abandoned facilities can have radiation (old medical labs, uranium mines) or industrial poisons. A well-known case is the ghost town of Picher, Oklahoma, where lead contamination (from mining) made all exploration unsafe. In extreme cases like Chernobyl’s Exclusion Zone, sites are only legally accessible via organized tours that control exposure.
Water and Confined Spaces: Drains, tunnels, and basements may flood quickly. Never enter a storm drain or tunnel if there has been recent rain, as water can rise unexpectedly (torrential urban floods can trap or drown explorers). Always check weather forecasts first. Also beware of dark, enclosed areas (small sheds, tanks, or rooms) where oxygen might be low or where gasses like methane could accumulate. If you venture into tunnels, carry a gas detector if possible, and never go more than a short distance without backup. Confined-space safety training is ideal; without it, it’s best to avoid unknown underground passages altogether.
Wildlife, People, and Security: Abandoned places often attract others – not all friendly. Guard dogs or even packs of stray dogs can lurk inside; carry something to scare them off (like a strong flashlight beam, noise, or dog deterrent spray). Rats and insects are common; a snake or rodent bite can happen, so wear boots and gloves. Also watch for squatters or homeless occupants; encounters can be unpredictable. If you do meet people, stay respectful and consider leaving – it’s not worth a confrontation. Some explorers say encountering squatters is one of the scariest risks. Carry a phone and have an emergency contact who knows your plans.
Security Measures: Many sites are alarmed or monitored, especially high-profile ones (former psychiatric hospitals, power plants, warehouses). Motion sensors, locked fences, and patrols are possible. Before entry, carefully check if fences are electrified or if alarm boxes are visible on walls. If you set off an alarm, your best move is to get out quickly (and quietly).
After surveying these risks, make a go/no-go decision. A common approach is a quick risk matrix: list the top dangers (e.g., collapse, fall, wildlife, arrest) and assign likelihood vs. severity. If any single factor is extremely dangerous (like a visibly unstable roof over a wide area), it may be wise to abort.
Sources of Info: Many of these hazards are noted by experts. Wikipedia’s urbex page explicitly lists dangers like “unstable structures, unsafe floors, broken glass, stray voltage, entrapment, asbestos, guard dogs, [and] squatters”. Allianz’s safety tips also warn explorers that rotten floorboards are the “most obvious hazard,” but mention that invisible dangers (like toxic land or radiation) can be more lethal. A prudent urban explorer respects these warnings.
Essential Urbex Gear & Packing Checklist
Exploring dangerous sites means equipping yourself properly. Here are the categories of gear every urbexer should consider:
- Protective Clothing: Wear tough, practical attire. Long pants and long sleeves (and possibly a waterproof layer) protect against cuts, scrapes, and the elements. Thick, sturdy work gloves (preferably cut-resistant) are a must for handling debris. Heavy boots with good ankle support (steel-toe or puncture-resistant) will protect feet from nails and rough terrain. A hardhat or helmet can be lifesaving in very risky sites with low ceilings or falling debris – some explorers use mountain or work helmets. Knee and elbow pads (used by graffiti artists or skaters) can help if you must crawl or kneel on rough ground.
- Respiratory Protection: Because dust and asbestos are common in old buildings, carry at least a disposable N95/P2 mask. For serious sites, a half-face respirator with P3 (HEPA) filters is even better. Fit the mask snugly before going in. If there’s any visible mold or crumbling insulation, put the mask on immediately.
- Eye Protection: Safety goggles or glasses shield against dust, rust flakes, or glass shards in poorly lit areas. A full seal goggle is ideal if dealing with lots of dust or chemical residues.
- Lighting: This is crucial. Carry a powerful headlamp (at least 300 lumens) so your hands remain free. Bring a backup flashlight in case the headlamp fails. Also pack extra batteries (headlamps drain fast in cold or wet conditions) or a portable battery pack. A phone can serve as a light, but quality varies; it’s best reserved for communication. Allianz reminds explorers that abandoned spots are often “off the grid” from civilization’s hustle, so you must carry all your own light and power.
- Navigation and Communication: Even if a site is small, it’s easy to get disoriented. Carry a GPS device or a smartphone with offline maps saved. Set up a meeting point and route in advance. A small handheld two-way radio can help if exploring in a team (mobile phone signal may not reach underground or inside thick concrete). Also a loud emergency whistle (and knowing Morse code signals for help) is a sensible precaution.
- Medical Kit: A first-aid kit is mandatory. At minimum include bandages, antiseptic wipes, tweezers (for splinters or ticks), and painkillers. Given the nature of urbex, also pack trauma supplies: gauze, tourniquet, and an Israeli bandage can control serious bleeding if someone falls on rebar or glass. Skipping medical gear is negligent.
- Tools: A good pocket knife or multi-tool can cut through tangled roots, open paint cans, or unscrew a bolt to turn off a valve. A roll of bright tape (survey or marking tape) can help mark exits or tag your path so you can retrace steps. Some explorers carry a rope or a small pry-bar, but be aware: tools may be seen as burglary tools by police. Only bring what you truly need, and never use tools to break in.
- Camera Equipment: If photographing, the camera must be ready for extremes. A DSLR or mirrorless camera with wide-angle lens is standard for interiors. Pack a sturdy tripod (for long exposures), plus spare memory cards and batteries. Keep gear in a weatherproof bag – many urbex sites are wet or dusty. Some use an energy pack or battery bank to charge devices on site (Allianz suggests including a power bank if your trip is long).
- Miscellaneous: Food and water are essential, even for a day trip; store energy bars and bottled water. Take hand sanitizer and wet wipes (many explorers get very dirty). A high-visibility vest or reflector tape is wise if you’ll be walking near streets to get there (for safety from cars). A copy of your ID or a backup of important info (offline) should be with a friend.
- Checklist: A good practice is to make a printable checklist. For example: Headlamps (primary + backup), Batteries / charger, Respirator mask, Gloves, goggles, helmet, First-aid kit, Camera with tripod, Map/phone with coordinates, Food/water, Companion name and contact, Route plan and exit strategy. Laminate this list or keep it digital, and go through it before every trip.
Photography for Urbex: Settings, Composition & Workflow
Photography is often a driving force behind urbex. Proper technique and gear care can transform the eerie light of an abandoned interior into a dramatic image.
- Long Exposures: Many abandoned sites have little to no ambient light. To capture them, use a tripod and slow shutter speeds. Set your camera to manual mode: low ISO (to minimize noise, though iso 800–1600 is typical in very dark spaces) and small aperture (f/8–f/11) for depth of field. Exposures can run many seconds, so use a remote trigger or timer to avoid shake. Experiment with light painting (waving a flashlight around during the long exposure) to illuminate dark corners. Always review the histogram to make sure you’re not overexposing bright windows or underexposing shadows.
- Lens Choices: A wide-angle lens (14–24mm on full-frame or wider on crop sensors) lets you capture large rooms and all surrounding details. A mid-range zoom (24–70mm) can isolate interesting features like peeling paint or machinery. For maximum detail in dim light, keep the lens steady on a tripod. Bring a microfiber cloth to wipe any lens dust; sometimes a hand-made lens cover (like an inverted beanie) can protect gear as you move.
- Protecting Gear: Old buildings can be wet, dirty, and corrosive. Before entering, slide your camera in a waterproof bag or cover. Put a UV filter on your lens (a cheap glass filter will take most scratches). If it’s moldy or humid, consider silica gel packets in your camera bag. Be prepared to gently brush off dust after the shoot. In wet places, plastic baggies can keep equipment dry (some explorers even use zip-lock bags around cameras). Always pack any expensive gear carefully, and never lay a tripod or camera on sloped rubble without secure footing.
- Workflow and Files: Shoot in RAW for maximum flexibility in post-processing (to correct white balance in mixed light, etc.). Some explorers recommend bracketed exposures (HDR) if the dynamic range is extreme (bright windows vs. dark rooms), then merge later. Use manual focus or focus peaking, as autofocus can fail in low light. Check images regularly on the LCD to verify focus (use zoom on the display).
- Ethical Publishing of Photos: When you later share your urbex photos, be mindful of sensitive information. Remove GPS data from images (most cameras and phones embed location). Do not post clear shots of signage or address plaques that reveal the exact site. Blur or crop identifying details (like a street number, company logo, or any private data visible). The community strongly discourages “doxxing” sites: if others can easily find the location from your photo, it might lead vandals or copycats to harm that place. Captions can say only general areas (e.g., “an abandoned hospital in [city]”), not the street. Responsible photographers also credit other explorers’ work if known (don’t claim discovery of a well-known spot).
- Insurance/Drives: Carry at least two memory cards so if one fails you have backups. Also bring spares for batteries in camera and lights, especially if shooting long-exposures which drain gear quickly. Charge everything before you go. Some seasoned explorers carry a portable battery pack that can charge phones or headlamps, or even camera batteries via USB. In all, treat equipment with care: dusty floors can ruin a sensor if you swap lenses without caution.
- Avoiding Trouble: If publishing the photos is your goal, remember legal lines. In most places, you can photograph anything visible from public property, but if you illegally trespass to get a photo, you could still be liable even if the photo itself is non-commercial. When selling prints or publishing in books, include a disclaimer that you took all necessary precautions. Some explorers even leave out the exact location entirely and focus on the image’s mood rather than site identity.
Fieldcraft: Entering, Moving, & Exiting a Site Safely
Once on site, safe practices and good habits keep an urbex team out of trouble. Treat the exploration like a careful expedition, not a reckless stunt.
- Day vs Night: Generally, daylight is safer. You’ll see hazards more easily in daylight, and law enforcement is more likely to spot trespassers after dark. However, exploring at night can sometimes avoid casual pedestrians or avoid security. If you do decide on a night visit, double your vigilance: turn every corner slowly, stick together, and use multiple lights. Avoid using flash inside, as it can temporarily blind you and make it harder to spot hazards.
- Teamwork and Roles: Never explore alone, especially as a beginner. In a small group (2–4 people), assign roles and communicate: one person leads the way scanning for dangers, another stays behind as a sweep, someone carries spare batteries, one is medic-officer, etc. Before entry, share the plan: point out each person’s gear checks, radio call signs, and rally points. Keep the group together whenever possible, or at least in visual/earshot contact. If noise is minimal, use whisper-talk to prevent startling anyone.
- Entry Techniques: Avoid kicking doors or smashing windows. If there’s a boarded window, remove a board quietly and step in, then replace the board when leaving. If you climb over a fence, try to leave it the way you found it (not bent or broken). The goal is always to minimize evidence of your presence. Inside, tread lightly: each step should be deliberate. Do not touch anything you don’t need to. When taking photos, set up and shoot quickly and efficiently; not only does this reduce time spent in danger, it also cuts down on noise that can attract attention.
- Marking Exits: It’s easy to get lost in large buildings. One trick is to carry small strips of fluorescent tape or use chalk to mark paths (chalk is less intrusive as it washes away). Just mark at junctions with arrows or a date. Never leave permanent markers or spray paint, as this counts as vandalism. Alternatively, use your GPS or a map app to continuously note your route.
- Emergency Drills: Before full exploration, have a quick evacuation drill. Identify obvious exits, windows, or doors you can dash out if needed. If you have radios, test them. Make sure everyone knows the assembly point outside if you get separated (e.g. “The abandoned warehouse corner” or a tree landmark). In case someone falls through a floor or is injured, do not attempt a dangerous rescue that could also injure you; call emergency services immediately if reachable. If trapped, having a charged phone and the capability to call 911 (or local equivalent) is critical.
- What to Do in an Emergency: If a team member is injured (cut, sprain, burn), the non-injured should begin first aid immediately. Stop any bleeding with pressure. If help is far away, consider whether a short retreat or stay is safer. For fire, retreat quickly and break a window or find a safe exit. For a collapse (ceiling or wall), sound an alert, back away, and regroup outside.
At every step, maintain situational awareness. Keep checking for unstable chunks overhead, listen for creaks, and be ready to move if something shifts. Being alert and methodical is more important than pushing further into the building. It’s usually not worth risking life or limb for a deeper shot.
Special Environments: Sewers, Rooftops, Tunnels, and Abandoned Transit
Certain urbex scenarios demand special caution beyond the general advice above.
- Rooftopping: Climbing to rooftops or other high structures is among the most dangerous forms of urbex. According to the urbex community and photographers, rooftopping “differs… as safety is more important than thrill”. Yet many enthusiasts have climbed cranes or skyscrapers for that one-in-a-million view. From a safety standpoint, never attempt rooftopping without climbing experience, harnesses, and full knowledge of structural integrity. Legally it is almost always trespass, and sometimes considered far more serious (especially near flight paths or in major cities). Fall risk is extreme (see Wikipedia’s list of fatal urban-exploring accidents – many are rooftop falls). In practice, we advise novices to completely avoid rooftops. It is simply not worth the risk. Use drones (see below) for aerial views instead of climbing to the roof.
- Storm Drains and Sewers: Entering drains is highly hazardous. Sudden flash floods are very real, as documented by tragic cases like a photographer swept away by rising water in a Chicago storm drain. Sewers may also harbor toxic gases or disease. Confined-space protocols apply here (gas detection, life-line). Unless you are trained in caving or confined-space rescue, it is safest to treat drains as off-limits. Never go alone, and definitely don’t climb into any pipe you cannot see through from both ends. Some urban explorers recommend only observing drains from above (e.g., open manholes in dry weather) rather than crawling inside.
- Subway and Tunnel Systems: Abandoned tunnels (subway, rail, utility) have similar flood and darkness risks – plus they are usually patrolled or have sensors. In many countries, entering a tunnel means federal law violation (danger zones, risk to trains, etc.). The Toronto Transit Commission, for instance, actively prosecutes illegal subway entry. Only enter transit tunnels with explicit permission (and ideally with a certified guide). Many ex-rail tunnels require reflective or anti-fall gear for safety.
- Other Specialized Sites: Abandoned amusement parks, ferries, or refineries each have unique dangers (electric rides may short, boats can sink suddenly, chemical tanks may remain pressurized). In any such site, research the specific hazards first. Often these places are best visited through organized events if possible (for example, some parks open to professional film crews with permission).
In short, areas like rooftops, sewers, and transit tunnels multiply risks many times over. Extreme caution or avoidance is the best policy.
Drones & Urbex: When to Fly, Permissions & Privacy
Drones are a growing tool for exploring, but they come with their own set of rules and ethics.
- Regulations: The most important rule is to follow local drone laws. In most countries, flying at night or near people without clearance is illegal. For example, in the U.S., the FAA requires drones to stay within line-of-sight and forbids flights near airports or emergency response scenes. Many national parks and historic sites have no-drone rules. Before using a drone at an urbex site, check both aviation regulations and the property’s local laws. In practice, operators should maintain at least 1.5 kilometers (1 mile) from non-consenting people (this includes bystanders, onlookers, or residents) and always keep the drone within sight. Keep altitudes low enough to not enter controlled airspace.
- Safety Rules: Use drones to scout from above before physically going in, not while you’re inside, to avoid distractions. Always pre-check batteries and props on the ground. Be extremely cautious of radio interference in urban areas (steel structures can disrupt control signals). It’s safer to launch drones from a cleared area near the site rather than inside a precarious building. Have a spotter watching the drone if possible.
- Ethical Considerations: Drones can unintentionally reveal hidden locations. If you use a drone to photograph an abandoned site, be aware that the images or video could pinpoint it. If publishing drone footage, use the same discretion as cameras: avoid geotags or identifiable features. Also, drones should not fly right next to windows or people, even if it’s an empty lot – this can invade privacy or cause panic. For urban sites, flying overhead from a public street is often safer and within law; flying through a hole in the roof is inviting damage and legal issues.
- When to Use a Drone: A drone can allow you to explore the vertical dimension of a site without physically climbing (for example, inspecting a high atrium or distant roof safely). It can also scope out security patrols or confirm the condition of a roof before entry. However, never use a drone as a substitute for due diligence on the ground – cameras on drones have limited range and resolution compared to what you see up close.
In sum, drones in urbex are tools that must be used responsibly. They can keep you out of harm’s way when scouting, but they are not a license to fly indiscriminately. Always follow aviation rules, and remember: flying illegally can lead to fines and confiscation of equipment.
How to Get Permission (Legally Visiting Abandoned Sites)
Whenever possible, aim for legal access. Visiting an abandoned building with permission completely changes the risk profile.
- Finding Owners: A first step is to identify who owns the property. This information is often a matter of public record. Many local governments have online property databases or cadastral maps. Enter the address or parcel number to find the current owner’s name and contact. Sometimes the owner will be a government agency (if it’s decommissioned public land), which means you may only need to apply for a permit. If it’s privately owned, you might find a phone number or mailing address attached to the name.
- Making a Request: When you write to ask permission, keep the tone respectful and professional. Explain who you are, why you want access (photography, research, etc.), and what you will (and will not) do on site. It’s wise to mention that you will have liability insurance, bring no more than X people, and leave the site clean. If you have credentials (photography portfolio, academic affiliation, press pass), include those. Attach any relevant media (your previous urban exploration photos, blog links). Some owners might ask for insurance or a rental fee. A friendly approach in person or a phone call might also work, but an email leaves a written record.
- Permits and Insurance: In places where the owner is a public authority (city, park service, etc.), you may need a special permit. For example, exploring an abandoned military base might require a police escort or specific waiver. Always check if a permit is required for filming or photography. Travel/health insurance usually does not cover illegal activities, but you can look for “extreme sports” or “adventure” riders. Allianz notes that most plans exclude illegal acts, so if you do get permission, disclose planned activities upfront in any insurance form. If you’re doing a high-risk Urbex trip (remote mine, toxic site), consider emergency evacuation insurance.
- Organizing Tours or Shoots: Some urbexers form groups that seek out permission together. If you want to bring a group into a site (e.g., photographers’ workshop), present it as a supervised tour. You might need each participant to sign a waiver acknowledging risk. For film crews or commercials, the production company often negotiates access formally. An example: in Chernobyl tours, operators have legal allowances and dosimeter checks for visitors. If you can channel your plan through an existing tour outfit (especially for dangerous sites like nuclear areas, abandoned factories), that’s the safest path.
- Document Everything: Keep copies of permission emails, signed waivers, or receipts for permits. If a guard or police officer questions your presence, showing printed documentation that you obtained permission can get you out of trouble. Without proof of permission, you are on your own.
Realize that many places are unavailable by permission – the owner refuses or cannot be found. In those cases, your choice is either skip the site or understand that going in will be trespassing, with all attendant risks. Always respect a firm denial.
Legal Alternatives to Trespassing (Safe Urbex Experiences)
Even if physical trespass is out, there are remarkable ways to experience the spirit of urbex legally:
- Open Abandoned Sites: Look for disused places that have been opened to the public. Many old industrial sites have been converted into parks or museums. Examples: Steeplechase Park in New York (a former beach amusements) or various “ghost towns” in the American West managed by parks services. World Heritage sites like Skellig Michael (an ancient monastic site atop cliffs) are essentially ruins open to visitors. These allow exploration under controlled conditions. In your own country, see if a historic register lists “open ruins” or “ruins parks” (some governments label them for tourism).
- Guided Urbex Tours: Some professional groups now run urbex-style tours. For instance, Cold War bunkers or railway stations sometimes offer after-hours tours with security supervision. There are also photography tours of abandoned buildings (with owner permission) in cities like Detroit or Berlin. Travel agencies in certain regions (e.g., parts of Europe or the US) offer “urban exploration” excursion packages. These could include wearing safety gear and following a guide’s instructions – legally, it’s just like any other special interest tour.
- Art & Heritage Events: Occasionally, heritage groups will open a typically forbidden site for a day (“heritage open day” or “permit weekend”). Keep an eye on local event calendars or groups dedicated to historical preservation. Universities or urban planners sometimes hold sanctioned explorations as part of research. Another option is to volunteer with preservation organizations; this can grant you keys to buildings slated for restoration.
- Legal Draining and Tunnel Access: Some cities allow access to storm drains or tunnels on special tours (for engineers or students). Look for official organizations or clubs. Never enter a utility tunnel on your own, but finding a sanctioned tour (if they exist) gives a taste without trespass.
- Non-Invasive Alternatives: If a building is dangerous or off-limits, sometimes a high vantage view or a drone flight (from outside the property line) can satisfy curiosity. Also, virtual urbex is growing: online 3D tours or video documentaries of sites (made by others who had access) can let you explore from home.
By choosing legal venues or events, you sidestep the risk of arrest and prioritize safety. These alternatives may not feel as “raw” as a secret infiltration, but they often provide high-quality access (good lighting, no dust masks) and the satisfaction of supporting heritage preservation.
Publishing & Monetizing Urbex Content (Without Getting in Trouble)
For many urbexers, sharing discoveries is rewarding – but it must be done wisely.
- Publishing Photos: As mentioned, strip geotags and avoid identifiable details. When writing captions or blog posts, focus on storytelling rather than pinpointing the location. For example, mention the city and year of abandonment but omit the street address. If you took a unique shot (like an interior mural or a specific machine), consider telling the story behind it rather than how to find it. This protects the place and respects any agreements you made. Many publishers require you confirm legal access; if you’re ever to be paid for an urbex photo or article, be prepared to show proof of permission or clearly state the context.
- Monetization (Gear Reviews, Workshops, Tours): Some explorers turn their passion into income by writing gear reviews, giving photography workshops, or even offering guided urbex experiences. Keep these aboveboard: if you guide others into sites, have them sign waivers and carry your own insurance. Affiliate links for gear (headlamps, respirators, cameras) are a common revenue source. Whenever you recommend a product (like the best headlamp for dark floors), be honest about it; transparency builds trust with readers. Avoid hard-sell language – focus on safety specifications (lumens, battery life, filter ratings) that actually matter for urbex.
- Legal Considerations: If you sell images or organize tours, remember liability. Many travel insurers warn that participating in illegal activities can void coverage. So if you lead a paid urbex tour, make sure the site is legal to enter or that you have permissions and waivers. For photographers, explain on your blog or channel that urbex is dangerous and not to trespass. Some content creators use watermark or voice-over disclaimers: “Never attempt this without permission or proper training.” This doesn’t eliminate legal risk, but it shows you’re mindful of ethics.
Monetizing urbex content is tricky but possible. The best practice is to frame it as adventure travel or historical exploration, not as a daredevil stunt. That positioning helps avoid encouraging illegal behavior among your audience. Remember that any profit from urbex photos technically comes from work done at a crime scene if you were trespassing, so legal entrants are ideal partners for such projects.
Insurance, Liability & Travel Logistics
Getting hurt or detained on an urbex trip can be disastrous. A bit of planning can mitigate these costs.
- Travel and Health Insurance: Most standard travel insurance policies exclude any accidents that happen during illegal acts (like trespassing). If you plan to do urbex abroad, look specifically for adventure or extreme sports add-ons. When purchasing, many insurers ask your planned activities in advance. If you fail to disclose urbex and then file a claim, they may deny it. Some people simply omit urbex from their insurance briefing (risky), but a more forthright approach is to ask about “rural area exploration” or similar terms that might cover it. A few insurers do have specific waivers for off-track travel; you may need to call and negotiate. Always carry documentation: travel policies, health insurance card, local emergency contacts.
- Emergency Evacuation: In very remote urbex trips (e.g., abandoned countryside mine, desert, or mountainside fort), plan for serious rescue. Know the phone number for mountain rescue or equivalent. Consider carrying a Personal Locator Beacon (PLB) – a device you activate in crisis to summon helicopter rescue. NGOs in many countries provide PLB for rent. Share your itinerary with a friend and check in with them when you finish exploring each day.
- Health Precautions: Keep tetanus shots up to date – rusty nails and cuts are common. If traveling overseas, research any local diseases (rats, bats, etc.) and get appropriate vaccines.
- Legal Precautions in Contracts: If you’re there as part of a media shoot (e.g. filming a documentary), always have legal clearance. Sign contracts releasing owners from liability if, for example, property owners allow entry. If you get permission from a private owner, ask if they require a liability release waiver (standard in adventure sports).
- Local Transport & Exit Plans: Logistics matter. If exploring a site far from civilization, arrange reliable transport both to and from (a fresh battery for your car, spare fuel, road map). Keep phone battery charged or bring a car charger. If you decide a site is too dangerous, be prepared to cut the trip short. Don’t get into a situation where you’re exhausted or it’s dark and you have a long drive home. Plan to leave the area while you are still confident and alert.
- Informing Others: Before every trip, leave a detailed note with a trusted friend or family member. Include the location (as specifically as you legally can), time you expect to return, and what to do if you’re not back by then. Also add how to identify you (clothes) and where your gear will be parked. If something happens, this information is crucial for search efforts.
In essence, imagine urbex as an expedition. Personal and travel insurance will often see it as hazardous. Take no short-cuts on safety – losing coverage or not having a plan could mean huge costs for medical evacuation or legal defense.
Community & Etiquette: Joining the Scene
Urban exploration has a rich community of enthusiasts. Tapping into it can improve your safety and respect for the craft.
- Online Forums and Groups: Subreddits like r/urbanexploration or Facebook groups are full of beginners asking questions, trip reports, and location hints. Read a lot before posting; people value discretion. Other platforms include Discord servers (Urbexology’s Discord is popular for spotmaps and advice). Always adhere to each community’s rules: many explicitly forbid sharing exact addresses of places. Contributing helpful info (gear reviews, editing photos, writing history of a site) builds trust.
- Local Explorer Meetups: In some cities there are informal meetups or clubs (sometimes just a chat group). Joining these can be safer than exploring solo, and you learn from others’ experience. For example, the UK has various urbex groups that organize joint trips. Be cautious though: do some background checking. If possible, start by following others online or offering to take notes/photos so people see you as serious.
- Etiquette Online: When posting your urbex adventures, focus on narrative and images, not maps. Many explorers share their story as a slideshow or video tour without pointing a map pin. If someone suggests they “found” a place, they usually don’t say where. Always use pseudonyms or carefully consider if revealing any identity is wise – the community values anonymity for safety.
- Respect Among Explorers: The unwritten rule is to give credit. If you visit a well-known site, acknowledge those who explored it first (this might mean a forum member who posted pictures before). If you reuse someone’s research or maps, cite them or link to it. Also, some areas are the turf of local explorers – if a local group is working on a place, be humble and ask permission to tag along rather than barging in with your camera.
- Location Sharing Debate: There’s an ongoing discussion in the urbex world about whether publicly posting locations helps or hurts. Some say the internet is a free-for-all anyway, while others strictly refuse to post anything that leads novices into trouble. As a newcomer, it’s best to err on the side of caution: do not post any full location lists or directions. Focus instead on the value of a photo or story.
Joining the urbex community is about mutual respect. Everyone is there because they love forgotten places and the challenge of exploration. Uphold that shared passion by respecting fellow explorers and the sites themselves.
Worst-Case Scenarios: Arrest, Injury & What to Do Next
Urbex involves risk. In case things go wrong, be prepared both practically and mentally.
- If You’re Caught or Arrested: Stay calm and respectful. In the moment, avoid admitting guilt beyond a simple apology or statement of misunderstanding (“Oh, I thought this property was open,” etc.). Show ID if asked – it’s usually required by law in many countries. If not required, it may be wise to hand it over to police calmly (wiping off GPS, but police technically are allowed to see ID). Politely decline to sign any statement or provide a confession without a lawyer present. If you have a permit or consent letter, present it. If detained, remember you have rights: for example, in the U.S./Canada, you can invoke the right to remain silent and the right to a lawyer. In other countries, procedures vary but generally you have some right not to self-incriminate. After release, do not say you’ll go home and come back later; simply comply and exit. In the event of charges, contact a lawyer who understands trespass laws. Keep a low profile on social media until the case resolves – public commentary could complicate defense.
- If Someone is Injured: Administer first aid immediately. If severe (unconscious, heavy bleeding, broken bones), call emergency services (note: you may have to reveal where you are – weigh that risk against medical need). If cell service fails, send someone to the nearest covered area to call. Document the incident: take photos of the scene (for any insurance or legal purpose) and record witness statements if possible. Even if minor, seek medical attention after the trip – injuries in urbex can get infected or worsen. If the person refuses help and you must leave, at least give them contact info for help (carry emergency rescue cards with your phone number).
- Insurance Claims and Legal Fallout: If an injury or arrest occurs, notify any relevant insurance (travel insurer, health insurer) as soon as you can, honestly describing what happened. Provide them your documentation (receipts, photos, witness info). Be prepared that claims may be denied if the incident happened during a known illegal act. If arrested, a criminal record is possible even if it’s a misdemeanor; consult a lawyer about expungement or plea. Save any official reports (police, medical) in case they are needed later (for visa purposes, for example, or if you plan to travel internationally and need a clean record).
- Reputation and Content: If your urbex activities lead to negative attention (e.g., a security footage or news article mentions your name), you may need to manage your online reputation. Some photographers blur your face or use an alias. If you published photos or videos of a contentious site, you may receive takedown requests. Cooperate gracefully if you posted something problematic – removing the content can defuse issues. Always keep copies of your original images (offline) in case you need them for evidence or as a portfolio in future legitimate projects.
Crucially, if things go wrong, reflect on what lessons to take. Many experienced explorers say: the safest urbex is the one you leave early. It’s better to turn back and feel disappointed than to push on and get hurt.
Best Practices Checklist (Quick reference)
- Research Done: Site location, ownership, legal status, and history studied in advance.
- Permission Attempts: Owner contacted or alternative legal access planned.
- Team & Itinerary: Partner(s) identified; itinerary and check-in plan given to a friend.
- Proper Gear Packed: Helmet, gloves, respirator, headlamp (+ spare light), sturdy boots, camera on tripod, first-aid, map/GPS, batteries/charger, whistle, water/food.
- Safety Briefed: Roles assigned, communication plan clear (e.g., radio channels), emergency exit and rally point agreed.
- Conditions OK: Weather good, no rain in forecasts (avoid flash floods), daylight if possible.
- Checkpoints En Route: Arrived at site, did ground-level survey, replaced any boards/windows opened, looked for hazards (e.g. loose ceilings, animals).
- Fieldwork Rules: Move quietly, mark path, watch each other, use lights everywhere, avoid climbing unsafe surfaces, no touching artifacts.
- Photography Caution: No geotags, minimal metadata, cover your tracks digitally (blurring if needed).
- Exit Plan: Confirmed exit route and timing (synchronize watches).
- Emergency Measures: Phone charged, emergency contacts ready, travel insurance & evacuation plan known.
- After-Trip: Debrief team about lessons, check for injuries, share sanitized report to community if promised (no private data).
Conclusion
Urban exploration can transform how we see a city. By walking its silent ruins, an explorer connects with layers of history that few others witness. A traveler who approaches urbex with preparation, respect, and care can reward themselves with unforgettable images and stories – without landing in court or a hospital. This guide has provided the essential framework: from understanding what urbex is, to legal boundaries, safety know-how, gear, and ethical guidelines.
The world’s abandoned places are out there waiting, but they will still be there tomorrow. The responsible explorer leaves them undisturbed. By following these best practices – thorough research, asking permission, suiting up with the right equipment, sticking together, and always weighing the risks – your urban adventures can be both thrilling and conscientious.
So lace up your boots, charge your headlamp, and set out with both curiosity and caution. The forgotten corners of our cities have tales to tell, and with the right mindset, you can become their witness and storyteller. Explore safely, and let the hidden urban landscapes enrich your journey.